Beranda
/ Easy Diy Cornice Boards : How To Build And Install A Window Cornice Box How Tos Diy : This is the length your cornice will be, including the side pieces (at 6 inches for each side).
Easy Diy Cornice Boards : How To Build And Install A Window Cornice Box How Tos Diy : This is the length your cornice will be, including the side pieces (at 6 inches for each side).
Insurance Gas/Electricity Loans Mortgage Attorney Lawyer Donate Conference Call Degree Credit Treatment Software Classes Recovery Trading Rehab Hosting Transfer Cord Blood Claim compensation mesothelioma mesothelioma attorney Houston car accident lawyer moreno valley can you sue a doctor for wrong diagnosis doctorate in security top online doctoral programs in business educational leadership doctoral programs online car accident doctor atlanta car accident doctor atlanta accident attorney rancho Cucamonga truck accident attorney san Antonio ONLINE BUSINESS DEGREE PROGRAMS ACCREDITED online accredited psychology degree masters degree in human resources online public administration masters degree online bitcoin merchant account bitcoin merchant services compare car insurance auto insurance troy mi seo explanation digital marketing degree floridaseo company fitness showrooms stamfordct how to work more efficiently seowordpress tips meaning of seo what is an seo what does an seo do what seo stands for best seotips google seo advice seo steps, The secure cloud-based platform for smart service delivery. Safelink is used by legal, professional and financial services to protect sensitive information, accelerate business processes and increase productivity. Use Safelink to collaborate securely with clients, colleagues and external parties. Safelink has a menu of workspace types with advanced features for dispute resolution, running deals and customised client portal creation. All data is encrypted (at rest and in transit and you retain your own encryption keys. Our titan security framework ensures your data is secure and you even have the option to choose your own data location from Channel Islands, London (UK), Dublin (EU), Australia.
Easy Diy Cornice Boards : How To Build And Install A Window Cornice Box How Tos Diy : This is the length your cornice will be, including the side pieces (at 6 inches for each side).. Cornice boards make an easy diy window treatment if you have ever checked out pinterest or googled cornices, you've probably run across at least one fabric cornice tutorial. A good, sharp utility knife. We revised this one a couple of times until the scallops felt right. I wanted to thank you for this great diy cornice. Measure the length of your window and add a foot to that.
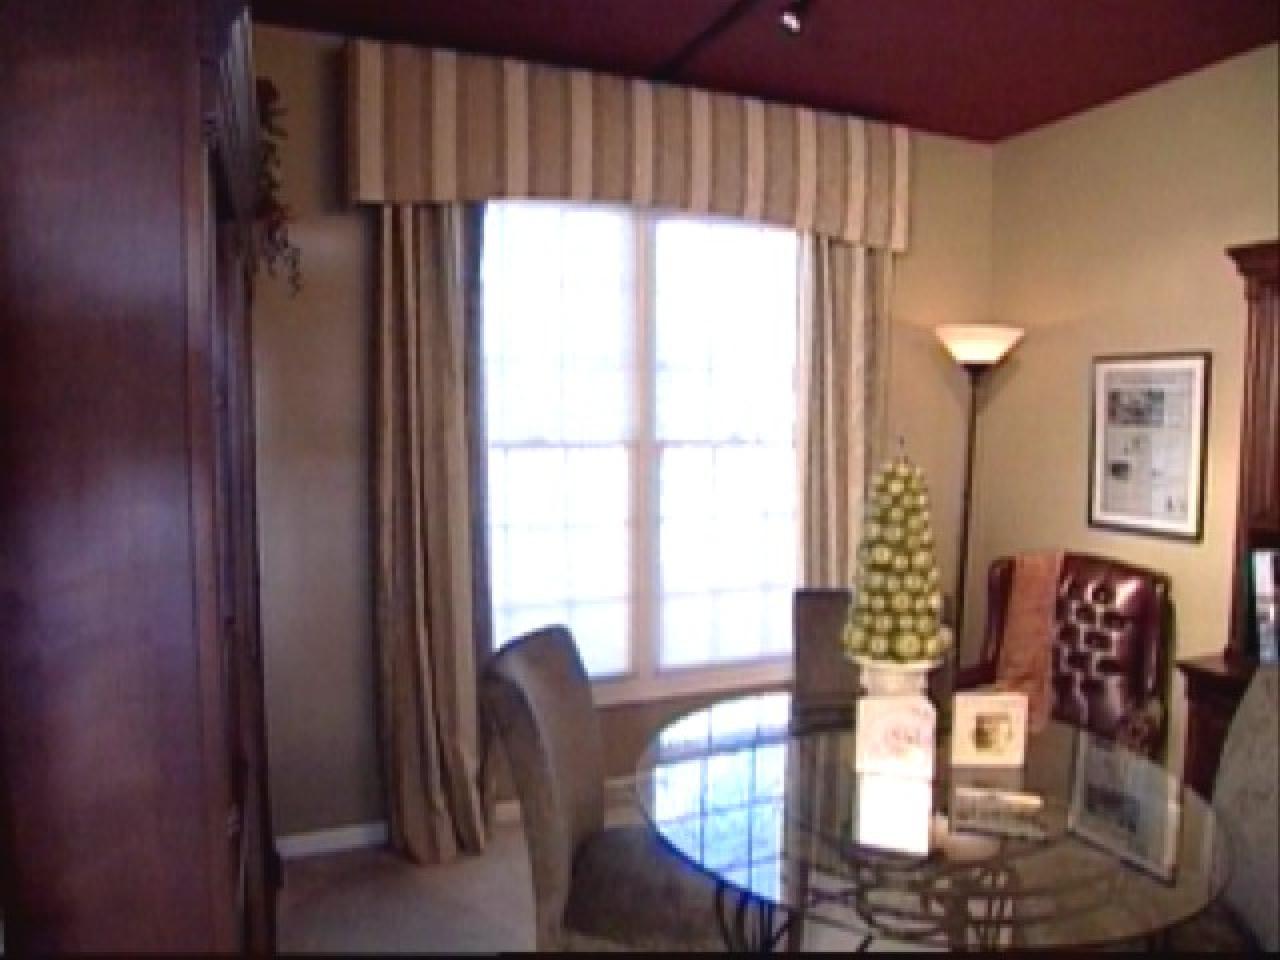
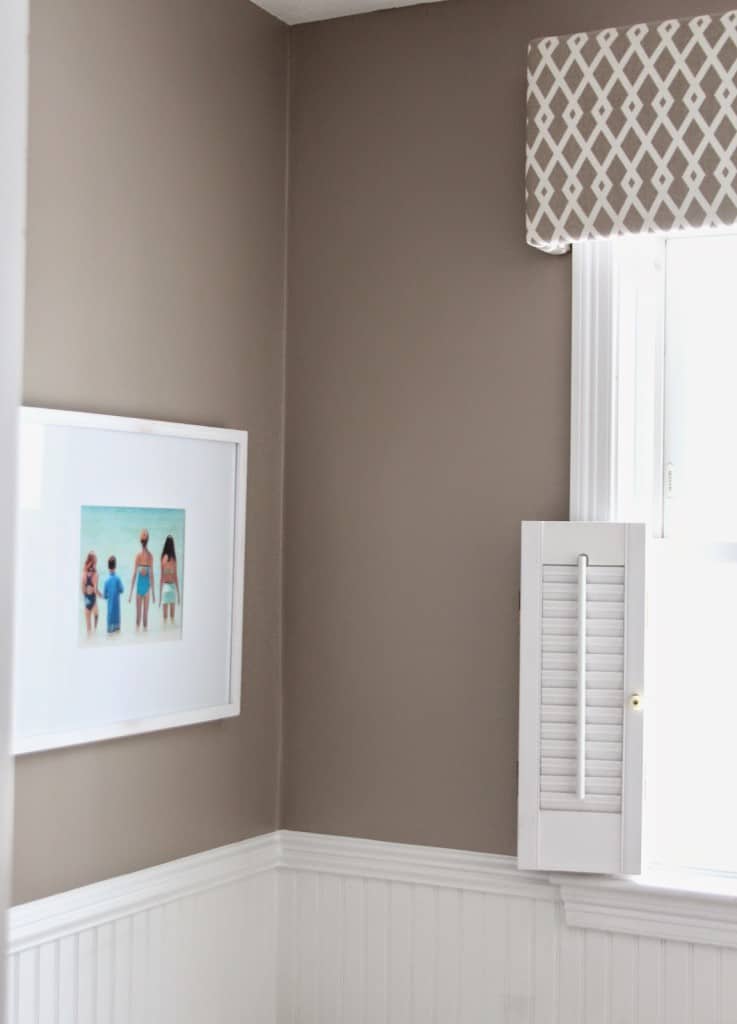
The cornice goes above the window and has to leave space for any curtains or blinds you'll have under it. If you have any questions please call or email us. To make your own, you will need: Leave approximately six inches of excess batting on the other side and cut off the excess. This will make it easier to join your wood pieces together without it splitting.
Make A Fabric Covered Cornice And Lined Window Panels Hgtv from hgtvhome.sndimg.com Then starting in the top and middle of your board, wrap your batting and fabric around the header and pin into place. Measure carefully where to install it. If you have any questions please call or email us. Building the cornice board measure the width of the window from the outside edges of the trim and then add 4″ (2″ allowance per side.) cut front of board to desired length (window & trim width + 4″). All of the blinds were left by the previous owners of the house and it looks like. This is your 1/5 of the length of the window measurement. Stitch the hem in place, leaving six inches unsewn at both ends. For this diy cornice board we built two prototypes first, a paper one to work out the proportions of the scallops.
Don't mind the grainy footage but the content is solid.beth allen shows diy way to custom cornice board for windows.
Measure the length of your window and add a foot to that. If you have any questions please call or email us. I spent $10 and 10 minutes to make my own diy window valances and here's how: You will need almost one box for each board depending on the size of your cornice. To make the lined, flat panels, cut the lining the same length as the fabric and four inches narrower. A little because of the architecture of the ho. Fold the bottom edge of the fabric over two inches, and then four inches to make a hem. My house has pretty boring windows. Stitch the hem in place, leaving six inches unsewn at both ends. This is the length your cornice will be, including the side pieces (at 6 inches for each side). Insulation foam board (if you can find 1.5″ thick like this one, this would be even easier. Pull tightly ensuring that there are no wrinkles on the face of the cornice then staple on the interior edge of the cornice box. Though the game might be difficult to master, it's easy to build the boards.
For this diy cornice board we built two prototypes first, a paper one to work out the proportions of the scallops. If you have any questions please call or email us. Fold the bottom edge of the fabric over two inches, and then four inches to make a hem. My house has pretty boring windows. Buy the appropriate amount of foam board you will need (i found mine at the dollar tree and needed 5).
1 from One to hold the cornice board in the correct position and the other to hammer the trim nails into the trim. Use your straight ruler to measure the same distance down from the top across the cardboard. Inspiration, cornice, window treatment, windows, decorating, nursery, how to, tutorial, decor, upholstery, diy. And there you have it…an easy diy project to give a nice pop of color to your windows! Measure the window's width then add a few inches to compensate for that. I wanted to thank you for this great diy cornice. Free shipping at home fashions u. My house has pretty boring windows.
Measure the window's width then add a few inches to compensate for that.
I sent this link to a friend, she used the same foam board and made a king size headboard, it looks great! The 9 drop height avalon cornice kit works great in kitchens, kids rooms, with small to medium wind…. Free shipping at home fashions u. Building the cornice board measure the width of the window from the outside edges of the trim and then add 4″ (2″ allowance per side.) cut front of board to desired length (window & trim width + 4″). The cornice goes above the window and has to leave space for any curtains or blinds you'll have under it. Inspiration, cornice, window treatment, windows, decorating, nursery, how to, tutorial, decor, upholstery, diy. I spent $10 and 10 minutes to make my own diy window valances and here's how: If you have any questions please call or email us. I wanted to thank you for this great diy cornice. Since these styrofoam cornice boards are so light we only used two nails per side…easy peasy! To make your own, you will need: So we just have 2 wide blinds in all of our windows. Pick up a package of panel foam like this:
I wanted to thank you for this great diy cornice. My house has pretty boring windows. One to hold the cornice board in the correct position and the other to hammer the trim nails into the trim. Drill holes in the wall and insert drywall plugs. Pick up a package of panel foam like this:
Fabric Covered Cornice Board How To Hang It Shine Your Light from www.shineyourlightblog.com Insulation foam board (if you can find 1.5″ thick like this one, this would be even easier. All of the blinds were left by the previous owners of the house and it looks like. One to hold the cornice board in the correct position and the other to hammer the trim nails into the trim. Insert screws inside drywall plugs. Measure carefully where to install it. The cornice goes above the window and has to leave space for any curtains or blinds you'll have under it. Since these styrofoam cornice boards are so light we only used two nails per side…easy peasy! Don't mind the grainy footage but the content is solid.beth allen shows diy way to custom cornice board for windows.
All of the blinds were left by the previous owners of the house and it looks like.
Measure carefully where to install it. My house has pretty boring windows. Don't mind the grainy footage but the content is solid.beth allen shows diy way to custom cornice board for windows. Cut 2 side pieces, 5″ wide each To make the lined, flat panels, cut the lining the same length as the fabric and four inches narrower. If you have any questions please call or email us. Gather your cornice board, 2 return pieces, screws and drill. Pull tightly ensuring that there are no wrinkles on the face of the cornice then staple on the interior edge of the cornice box. Drill holes in the wall and insert drywall plugs. Leave approximately six inches of excess batting on the other side and cut off the excess. Spray the board with krylon easy tack (or some other spray adhesive) and put the batting onto the board. Stitch the hem in place, leaving six inches unsewn at both ends. Staple one side of the batting on the interior corner using a staple gun and 5/8 staples.